Author: Michelle

Finding Gold in the Rockies

Finding Gold in the Rockies

While cooler temperatures at night have most people thinking of curling up with a good book and cozy sweaters, true outdoors enthusiasts know that these cooler temperatures bring about the perfect conditions for fall hiking and photo-worthy views: light dusting of snow on the mountain tops, lingering twilights, and best of all? Changing leaves on mountain slopes.

While Alberta doesn’t have the autumnal reds that you can find in Eastern Canada, we are pretty fond of the colours that we do have: the flaming orange/reds of fireweed, living up to their name; yellow aspen leaves that tremble in the fall winds and, our favorite, the feathery gold of larch trees, the only conifer tree to shed its needles!

Larix Lyallii, or more commonly, the Alpine Larch, can be found at elevations of 5900 feet to 7900 feet in the Rocky Mountains. These trees look like your average needled conifer for the spring and summer, but when fall rolls around, the tree turns golden and drops its needles, sitting bare all winter long.

While only found at higher altitudes, these golden trees are well worth the hiking that it takes to see them in person. They are usually dispersed throughout a mixed conifer forest, lighting it up with chunks of gold.

So where does one go to witness this miracle of nature? Here in Kananaskis, we are lucky to have easy access to many trails with fantastic larch views. Here are some of our favourites:

Rawson Lake

Distance: 7.8km, Out and Back

Elevation: 320m

Location: This trail starts at the Upper Kananaskis Lakes Day Use area and climbs above the lake.

Highlights: Aside from the larch trees, this trail takes you to a scenic alpine lake.

Chester Lake

Distance: 9.2, Out and Back

Elevation: 300m

Location: This trail starts at the Chester Lake trailhead, on highway 742.

Highlights: This hike meanders and climbs through a spectacular forest before taking you across an open alpine meadow and to Chester Lake, beneath a towering Mt Chester.

Our absolute favourite hike for viewing the larches is Ptarmigan Cirque. The trail is our favourite for several reasons: its located at the top of Canada’s highest paved road, so the hike starts at 7000+ feet above sea level, there is a series of beautiful waterfalls and rock features that make the hike down breathtaking; we also love exploring the cirque feature at the top of the trail. Since this hike is one of our absolute favourites, we offer it daily, with a shuttle ride from the Kananaskis Village and a certified interpretive guide to make the most of every moment along the trail. 

Ptarmigan Cirque

Distance: 4.5km loop

Elevation: 210m

Location: This trail starts at the Highwood Meadows trailhead, crosses highway 40, and climbs between Mt Rae and Mt Arethusa

Highlights: Diverse and scenic forest, wildlife viewing opportunities, waterfalls, rock features, and a beautiful mountain Cirque.


Latest Stories

Summer Tours

Winter Tours

Like this article? Share!


Continue reading

Winter Activity – Play Outside Guide

Winter Activity – Play Outside Guide

Our fatbiking and snowshoe adventures were recently featured in the Kananaskis Valley Winter Activity Guide, published by Karen over the Play Outside Guide, a popular website for getting families outdoors and active!

The Play Outside Guide is published by Karen Ung:

Karen Ung is an outdoor adventure and travel writer based in Calgary, Alberta. With her Geography degree and experience leading hikes and backpacking trips in the Rockies, she is full of ideas on where to go and what to do. The mission of her blog, Play Outside Guide, is to provide “everything you need to know to get outside and have fun.” You might recognize her name from being featured regularly on CBC Radio or on Global News Calgary.

To see what Karen has to say about Kananaskis Outfitters and other amazing winter activities in the Kananaskis Valley, check out the full blog post here.


Latest Stories

Summer Tours

Winter Tours

Like this article? Share!


Continue reading

The KO Team Visits Wild Life Distillery

Visiting Wild Life Distillery

Have you heard about Adventure Hub? Yes? Awesome! No? Then you need to check this out.  What is Adventure Hub? Well long story short, it is a curated group of experiences from incredible, locally owned companies focused on offering unique experiences based on their personal expertise. With experiences from cave exploration with Canmore Cave Tours, to sleigh rides with Boundary Ranch or float trips with Canmore Raft Tours, Adventure Hub has it all. Kananaskis Outfitters is proud to be a member of this incredible group and we love working with these other amazing experience providers to plan awesome days for our guests in the Canmore/Kananaskis area.

So what do a bunch of mountain-loving folks do when they want to get out for an evening together? Well, the Kananaskis Outfitters team looked to one of our partners over at Adventure Hub for a solution to our dilemma about what to do on a chilly Saturday evening in the shoulder season. This weekend we decided it was long past time that we go and check out the Wild Life Distillery in Canmore.

Photo from the Rocky Mountain Outlook

We were greeted at the distillery by Keith, one of the owners/founders of Wild Life. His passion for what he does is evident right from the get-go. The distillery felt warm and cozy, especially on such a cold, snowy night. Warm woods and a clean, modern industrial look are a welcoming combination. We started out with a tasting of the different spirits that Wild Life has to offer. Their Vodka is an easy-drinking spirit, made from 100% Alberta grains.  Their Gin is an incredibly aromatic blend of juniper, citrus, and other botanicals that drinks well on its own or mixed into a cocktail. However, the favourite spirit of the Kananaskis Outfitters team was the Alberta Gin. This twist on a classic gin is made with all locally sourced botanicals like Rocky Mountain Juniper, Labrador tea, and cow parsnip. The surprise twist? The smoke from the wildfires this past summer actually added a smokey flavour to the botanicals being used. It gives this gin a seriously mouth-watering flavour that makes it one of the most uniques spirits we have ever tasted. Beyond just the tastings, they also offer a seriously unique cocktail menu, made artfully in front of you.

Following our tasting, Keith treated us to a distillery tour. It was incredible to hear about the passion that gave birth to this local distillery and the learning curve that came with creating a craft distillery from scratch. The process that goes into the actual making of the spirits is pretty cool to see firsthand.

The Kananaskis Outfitters team had a great evening visiting the Wild Life Distillery in Canmore, and you need to check it out on your next visit to the area! Interested in booking a distillery tour? You can do so here!


Latest Stories

Summer Tours

Winter Tours

Like this article? Share!


Continue reading

How to Hike Safely

How to Hike Safely

Hiking is a fantastic way to get outside and enjoy Alberta’s beautiful backyard! Obviously, we are partial to the hiking trails in Kananaskis, but there are just so many incredible places to explore! No matter where you are hiking, there are certain things to take into consideration and certain things to plan for to make sure that you have the most enjoyable experience possible. Check out our top five list of things you need to do and know before heading out hiking:

1. Research Your Route

One of the most important things you need to know is where you are going. Researching your potential route can take on many forms such as: talking to locals or professional guides. reading blog posts, referencing trail guides, etc.

Once you have a trail in mind, check a second source for information. For example, if a local tells you about it or you read a random person’s blog post on it, look it up in a reputable trail guide. If you are liking the sounds of the trail, then it’s time to look it up on a topographical map. Topo maps (like the Gemtrek ones for the Kananaskis Area) are an incredibly valuable tool in the planning stage of the hike as well as when you are actually out hiking. All of this planning can be done well in advance of the day of the hike, and it’s something you can make fun for the whole family! If you have kids, show them on the map where you are going and share with them what you hope to see. Ask them to use their imagination and tell you a story about what you are going to see along the hike.

Closer to the day of the actual hike, check the local trail reports for closures due to weather or bears, or other unforeseeable conditions. This is where it’s a good idea to have a backup plan for the trail so that if the trail you wanted to hike is closed for some reason, you can still get out for an awesome day outside!

2. Hike in Your Comfort Zone

While it’s great to challenge yourself with new terrain and bigger, longer hikes, you never want to get so far in over your head that you end up in trouble. Take manageable risks and if doing something that is way more difficult than you are used to, then go with someone who has done that route before, or who has more experience than you. Think about all the members of your group and pick something that is appropriate for everyone. You definitely want to always be expanding your horizons in terms of what you are hiking, but take it in steps and work yourself up to the big stuff!

3. What To Carry

This is by no means a complete list of everything you need to carry for every hike, but these are the basics that you should never forget.

  • Map (more helpful with a compass, especially if you know how to use it)

  • Headlamp or light of some kind, even for daytime hikes

  • Enough food and water for all members of the group, including pets!

  • First Aid Kit (throw in some extra moleskin for blisters!)

  • Emergency blanket, or extra layers

  • Sunscreen, sunglasses (bug spray is also a good idea)

  • Bear Spray

Everything in your hiking ’emergency kit’ or ‘go bag’ can be packed into a dry bag (except for the bear spray!) and stuffed into your backpack so it is safe and dry if you need it.  Bear spray should always be kept accessible and on the outside of your pack, or on a belt so that it is there if you need it.

Bears of Kananaskis4. Bear Spray

If you are hiking in the mountains, then you are hiking in Bear Country, no exceptions. There is always the chance to encounter a bear on any given trail, at any given time. To avoid encounters, you should make noise, preferably in the form of talking to the other members of your group. Talking is a distinctly human sound, so you are less likely to surprise a bear, and most encounters happen due to surprise.

“So what about bear bells?”

There is a lot of controversy over whether or not bear bells work, but a lot of experts agree that they are not an effective way to prevent bear encounters. The noise is repetitive and can sound like a bird, so it is easily tuned out by bears. Talking is a far more effective way to prevent a bear encounter. Bells will 100% not stop a bear if it chooses to stalk or attack you; this is where bear spray becomes a necessity. Bear Spray is proven to stop aggressive bears.

The second most important thing after carrying bear spray is knowing how to use it. It’s not very useful for you if you don’t know what to do with it, so make sure that when you buy it, you ask the store selling it how to use it. We always give a full demonstration with empty cans and make sure people feel comfortable using it before sending them off into the world. There is also a lot of good information on the bear spray can itself, so make sure you read it. Alberta Parks has also created a great video showing how to use bear spray, you can watch it here.

5. Tell Someone Where You Are Going

This final step is a very important one: always make sure someone knows where you are going and when to expect you back. Set a ‘due back by’ time and have a procedure in place for if you do not check in with your safety person at the designated time. In Kananaskis, when there is an overdue hiker, you can call Kananaskis Dispatch and the dispatcher will help you work through finding the missing hiking party. For this step to be effective, the reporting person needs to know some specific information: Where the group is hiking, the name of the trail/route, trailhead name, what vehicle to expect at the trailhead, etc. 

You can see how a little planning can make for an amazing hike, with less chance of things going sideways on you. While we love being spontaneous as much as the next person, when it comes to personal safety, it is better to play it on the safe side.


Latest Stories

Summer Tours

Winter Tours

Like this article? Share!


Continue reading

Visiting Bear Country

Visiting Bear Country

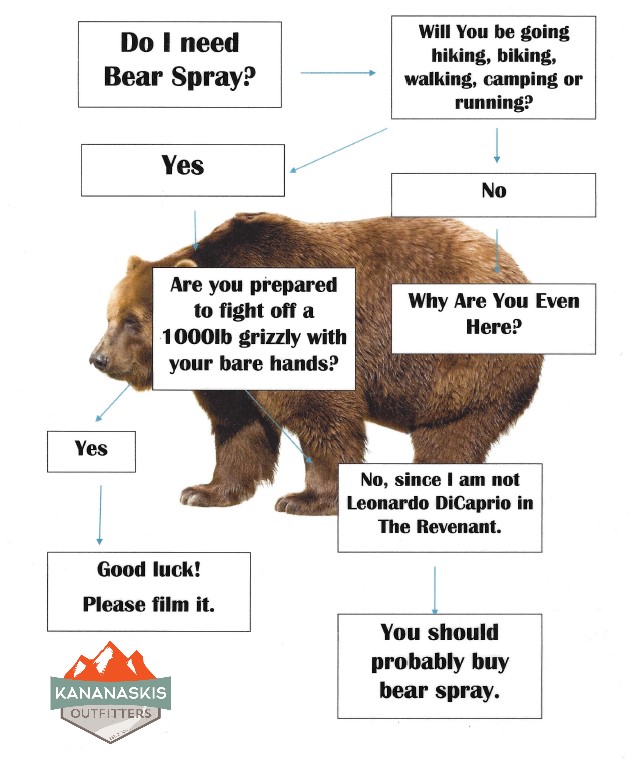
Bears are a hot topic in Kananaskis. We frequently get asked by visitors to the area if there are bears here, and once told that there are in fact bears here (grizzly and black!), the follow-up question is usually ‘Well do I need bear spray?’

The follow-up question is usually ‘But are there actually bears?’ Yes. There are actually bears in the Kananaskis area. Bears can be found everywhere in the Rockies, to be precise. Should you live in fear of bears? Heck no! There is no point in being afraid of bears, what everyone really needs is to be educated about bears, and bear safety. Carry bear spray and know how to use it. When you are buying it, the place selling it should give you a full demo on how to use it. If not, ask someone who is familiar with it. Knowing how to use bear spray is vital to feeling comfortable carrying it, and therefore comfortable in bear country.

  • Top things to remember in Bear Country: 

    • Do not leave food/attractants laying around. This includes things like soap, shampoo, petroleum products, alcohol, packaged food, pet food, etc.
    • Do not feed ANY wildlife. Those cute squirrels or chipmunks that take food from your hand? They’re not eating all of it, they are caching it. That means they are burying it around your campsite or picnic area. Buried food attracts bears.
    • Do not approach bears intentionally; do not try to pet them, ride them or feed them.
    • Make noise when you hike, this way you won’t surprise wildlife on the trail. Most animals really don’t want to see us, we just surprise them when we move quietly through the woods and they are bound to react defensively. Think about times when someone jumped out at you.
    • Give wildlife its space, especially bears. It’s better to have to backtrack on a trail than to risk it and skirt too close to a bear.

Should you be afraid of being in bear country? No! Should you be respectful towards and educated about bears and bear safety? Yes! It is quite common for hikers to see a bear while out and about in the Kananaskis area.  Typically the bear will move off, not wanting anything to do with people.

  • Things you probably didn’t know about bears:

    • Bears are not true hibernators. They go into something called torpor, where they can wake up if disturbed or if weather conditions change.
    • Female bears give birth in January/February to cubs the size of a pound of butter.
    • Bears will occasionally make ‘nests’. They will climb a tree and pick branches to eat the fresh shoots on the end and then they will drop the branches and they will collect in the tree, creating what appears to be a very large nest.

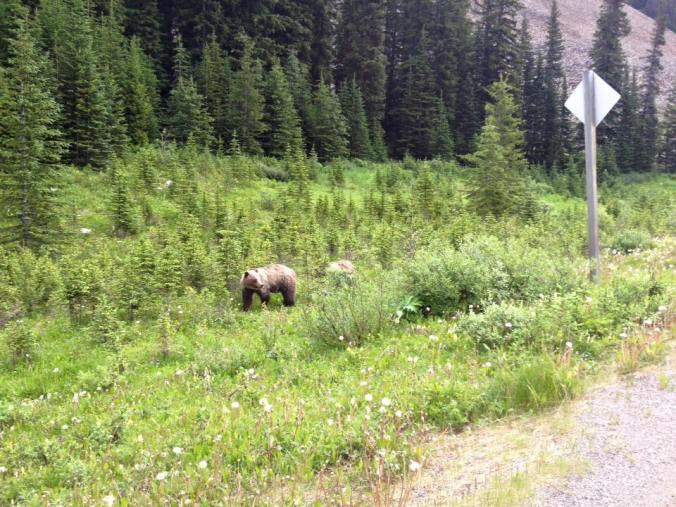
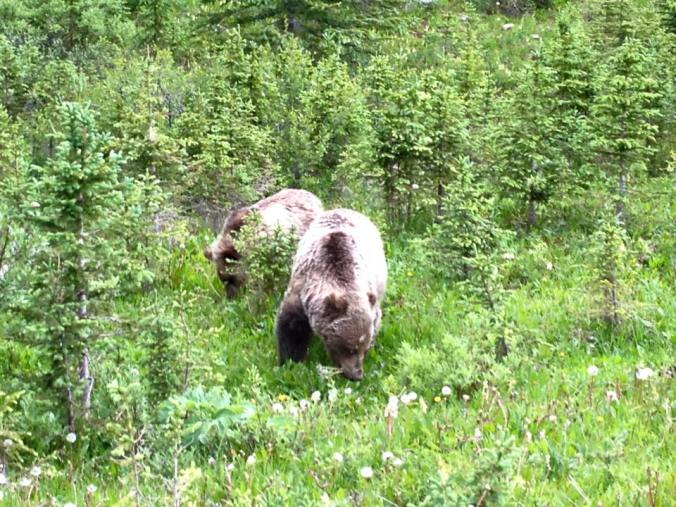
Bears are beautiful animals; here are some of our locals:

13391629_10209778447167617_1736924449883383174_o13415404_10209778446687605_6612827965737369108_o13433199_10209778443407523_4348793489247828385_o13528059_10209924873228177_7049382664430607961_o13528266_10209924871268128_8330378453051952805_o13558835_10209924850827617_61925578960774681_o13615428_10209985333339642_8710376656281918563_n13620203_10209985332379618_4533391963689462429_n

On photographing bears (and other wildlife)

Everyone wants that amazing and perfect close-up of a bear in the wild, but is that photo worth your life? Or a bears? A bear that becomes overly comfortable with humans, or with humans feeding it, is almost guaranteed to end up dead at the hands of humans, either having to be put down because it sees humans as a food source, or dead due to road mortality because it doesn’t see cars as a threat, or people are driving unsafely around it.

Over the years, working for Parks and now as a guide in the Rockies, I have seen some seriously crazy stuff. People need to realize that wildlife is…wild. You can’t walk up a wild animal like it’s a neighborhood dog. And sure, maybe the person before you did it, and they were fine. Maybe you can do it too, this one time. But it’s always okay,  right until it isn’t. Then the next thing you know, there is a story on the news of a ‘bear attack’ and everyone calls it a tragic accident.

The truth is, most negative wildlife encounters are completely avoidable. Respecting an animals personal space and making noise so as not to surprise them will help stop most negative encounters.

Here are some ‘Best Practices’ for photographing or viewing wildlife.

1. Stay in your vehicle.

If you are driving and you see an animal roadside, then it’s simple: Stay in your vehicle. Things start to go wrong when people start to view the wildlife as tame animals. Just because the bear is on the side of the road, and seems more interested in food than you, does not make it okay to get out and approach it.

2. Do not cause a bear jam.

Or a deer jam, or a squirrel jam, or any sort of traffic jam for whatever it is that you see. If you see wildlife, and you are going to stop for a better look, then pull over on the shoulder of the road as far as you safely can. If you cannot safely pull over and get off the road, then you don’t stop.

3. Do not harass the wildlife.

Do not stay by an animal for more than a minute or two (refer to #2). The bears do not enjoy having vehicles stop by them and stay there for an extended period of time. If you are going to stop and can safely do so, then stop for a minute or two, snap your photos, admire the animal and be on your way. We do not want animals to become accustomed to humans because in the long term, that is how they end up dead.

4. Do not bait the wildlife.

On this point, most people are probably thinking ‘Well obviously!’ But a lot of people are unintentionally ‘baiting’ wildlife through simple carelessness. Do you know how many common camping items are actually considered bear or wildlife attractants? Things like: toothpaste, shampoo, soap, cooking oil, canned goods, alcohol, freeze-dried foods, pet foods, dirty dishes, the clothes you cooked/ate in, etc. By leaving these things out and unattended in day-use areas or campsites, you are inviting wildlife into your site.  A fed bear is a dead bear. And no photo is worth a bear’s life.

5. Do not feed the wildlife.

Any of it. Not even that cute squirrel or bird. Have you ever fed a squirrel or chipmunk and noticed that they are taking a lot of food? Like more than their own body weight in food? They are not eating it all, they are cacheing it around your site, creating little hidden treasures of food that will attract other animals to the area.

6. Do not touch the wildlife.

By now, everyone has probably heard about the well-meaning tourist in Yellowstone who picked up the bison calf because he ‘thought it looked cold.’ Do not assume that baby animals who appear to be left alone, are abandoned. Mothers in nature know what’s best for their young and it is not our job to interfere. Do not pick up wild animals, if you are concerned that something has been abandoned, or is injured, report it to your local conservation officers, park staff, or fish and wildlife officers. You can find these numbers online for your local area.

7. Use a long lens.

Do not expect to get a great close-up photo with your smartphone. Please don’t even try to do it. Use a zoom lens, or take the photo and crop it down after. Approaching wildlife with a smartphone to get a close-up photo is a sure way to get hurt.

So what do you do if you come across a bear on the trail or on the roadside? You should call it into your local wildlife hotline. Google to find your local wildlife authority or parks service. If you call in a report, you are going to be asked for some basic info. Here are some things that you will probably be asked:

  • Your name and contact number
  • Type of Bear (black or grizzly, remember not all black bears are black!)
  • Location – try to get as many landmarks as possible, signs, intersections, etc
  • What the bear was doing
  • How long ago you saw it
  • If the bear was eating, what it was eating.
  • How close you were to the bear
  • How it reacted (surprised, aggressive, indifferent, curious, etc)
  • Visible tags or collars (note numbers on tags and color of tag if possible)
  • If there were cubs, how many?
  • If it was roadside, were other people stopped/getting out of vehicles

This information is used for biologists to track bears and behavior and also used to dispatch conservation officers to help move bears along and stop human-bear conflicts. If you see a conservation officer or parks employee on the scene, then do not report it. The person on scene is there because someone else has reported it/they are already aware of the situation so you do not need to create duplicate calls.

People visit the mountains because they want to enjoy the landscape and the wildlife, so if everybody would do their part to be here and respect nature then we can ensure that these places are here and protected forever and that future generations will get to see these magnificent animals in their natural habitat.

When you live out here, you see some of the same bears on a pretty regular basis; you honestly start to love them and love seeing them. You get to watch cubs grow up, bears flirting during mating season, and bears fattening up during the fall. You eagerly await seeing the first bear of spring, since that means spring is really here.

What I want people to take away from this is that bears are incredible creatures that have a place here. This is their home that we are visiting and if we all follow some basic guidelines, we can live and play in bear country without being afraid.

Stay up to date with current Alberta Parks advisories here.


Latest Stories

Summer Tours

Winter Tours

Like this article? Share!


Continue reading

Kananaskis aka Hollywood North

Kananaskis a.k.a. Hollywood North

The Kananaskis area is well known for being a big and beautiful wilderness area where people go to explore the mountains and enjoy some serenity. It is also an area well known for being significantly quieter than the neighboring mountain towns of Banff and Canmore. But it’s not always a sleepy little village, there are secrets to be found in Kananaskis.

One of the best-kept secrets of Kananaskis?  Just how many movies are actually filmed out here?  And we are not talking cheesy B-roll sci-fi films. There are several giant Hollywood blockbusters filmed out here in Kananaskis every year.

The Revenant is one of the more famous movies filmed out here. After all, Leo finally won an Oscar for his performance! This movie caught a lot of attention for the way in which it was shot using natural light. The mountain landscapes were stunning and…  familiar if you’ve spent time in Kananaskis. You might recognize the scene in which Leo was walking down the middle of a frozen lake as Spray Lake or the scene at the end as Fortress (the old ski resort!).

Here are some other movies you might recognize:

It’s not just movies! Lots of commercials are filmed out here as well; typically car and beer commercials, although there was a ‘Drink Milk’ commercial filmed just outside of Canmore last year. I accidentally walked into a Coors Light commercial set earlier this winter at Boundary Ranch. I’ve never seen so much beer before in my life!

So why Kananaskis? Once you get up into the alpine environment here, it looks a lot like Alaska, but it is way easier to get to. The Calgary airport is an easy hour’s drive away on paved highways, so Kananaskis is extremely accessible. The scenery here is breathtaking, and there is a wide variety of landscapes, from mountain tops to alpine meadows, to the large lakes. Take a drive through Kananaskis at any time of the year and it is pretty clear why Hollywood loves Kananaskis.

There is no such thing as a dull day working or living in Kananaskis. Having actors and film crews come through renting mountain bikes or picking up a toque is an added fun bonus to living in such a beautiful spot. So next time you pass a guy on the trail who looks like Leonardo DiCaprio… take a second look!

Have you recognized Kananaskis in any of these films? Can you name any other films, tv shows, or commercials filmed out here?


Latest Stories

Summer Tours

Winter Tours

Like this article? Share!


Continue reading

Fat Tire Revolution

Fat Tire Revolution

In November of 2016, we invited Calgary Guardian writer Tyler Dixon to join us on a fat bike adventure. This is what he had to say about it.

Here in the Canadian Rockies the seasons have traditionally dictated our outdoor activities. The warmer months were the realm of hiking, camping, rock climbing, mountain biking, and paddling while the coldest parts of the year were reserved for skiing, snowboarding, ice climbing, and snowshoeing. But with recent advances in technology and gear development some of our favourite outdoor pursuits are no longer dependent on the confines of the seasons. Activities like kayaking and river surfing are now performed twelve months of the year and with the invention of fat bikes, mountain biking is also a year-round sport that is only gaining in popularity.

To read the full article, check it out here.

Interested in a Fatbike Frozen Waterfall tour? Book Now


Latest Stories

Summer Tours

Winter Tours

Like this article? Share!


Continue reading

Photographing the Aurora Borealis

Photographing the Aurora Borealis

che_3202 We like to time our tours to correspond with space events, things like meteor showers, or peak nights for the Northern Lights. We always welcome cameras on our hikes and are happy to offer some astrophotography tips.

For this post, we are going to focus on how to photograph the aurora borealis, aka the northern lights. I am an aurora chaser, so almost every night of the winter I am outside, bundled up, and set up with my camera to photograph the aurora borealis over Kananaskis. I love the opportunity to help people take amazing photos of the night sky and have compiled some tips on taking photos of the aurora:

It’s not as hard as you may think to photograph the aurora, but there are a couple of things that you definitely need:
stargaze1• Camera with manual settings
• Spare camera batteries (long exposures drain batteries. So                   does the cold)
• Wide angle lens. No zoom lens, although kit lenses will work.
• Tripod
• A clear view to the North/North-East
• Dark skies
• An Aurora forecasting app/website
• Lots of patience

Before going out, check the aurora forecast. A simple Google search will bring up lots of options for aurora forecasts and all will give you the same basic data: forecasted levels of geomagnetic activity and what the aurora is doing right now.

The best time to catch the aurora is when the sun is on the opposite side of the planet. This is why it’s easier to catch the aurora in the winter, there are more hours of true darkness. It’s still possible to catch the aurora in the summer, there is just a much smaller window for viewing. It also helps if there is no moon. A full moon cast so much light, that it will interfere with your ability to see the lights.

So now that you are set up in a dark area with a clear view of the skies, what do you do with your camera? Cleary shooting on auto isn’t going to cut.

There are so many ways to set your camera to catch the lights, and no one way is right or wrong, however, there are some basics to keep in mind.

  1.  Focus your camera to infinity. Some lenses’ have an infinity symbol, but if yours doesn’t, zoom in on a distant light (like as far away as possible, I will use stars or planets) and manually adjust the focus of your lens until that distant point is clear. Remember to switch your camera to manual focus or as soon as you hit the shutter button, you will need to re-focus your camera.
  2. Use a tripod. It takes a long exposure to catch the northern lights, longer than you can standstill. A tripod will guarantee a crisp, in-focus shot (if you followed the first step correctly 😉 ). It’s also a good idea to use a remote, or the self-timer function to fire off the shutter so as to eliminate handshake from pressing the shutter.
  3. Turn your ISO up. ISO adjusts the light sensitivity of the sensor in your camera. The higher the ISO, the more light-sensitive it is. Some cameras handle higher ISOs better than others. The higher the ISO, the grainier the photo will get. You need to find the balance between aperture, shutter speed, and ISO to get a well-lit photo that retains high quality.
  4. Shutter speed: If the aurora is bright, you can get away with a shorter shutter speed. Short in night photography terms being <10 seconds. If the aurora is faint, or not really dancing, I like to do a ~20-second exposure. If your exposure is too long, all the lights will blur together and you will lose the definition of the movement. If you do an exposure of longer than 30 seconds, you will actually start to see the stars move in the shot. More on star trails another time…
  5.  Aperture: this is the f/ value on your camera. It adjusts how much light is let into the lens. The lower the number, the more you can adjust your plane of focus. The higher the number, the more of your shot will be in focus. At f/22, everything will be in good focus, whereas at f/2.8 you will have a very shallow depth of field. When shooting the night sky, you obviously want as much of everything in focus as possible, so aim for a higher f/.
  6.  Play with your settings! Remember, there is no right or wrong, there is just creative freedom 😉 Start out at something like f/11, ISO 1600 for 10 seconds and see what it looks like. If it’s too dark or too light, adjust. Keep playing until you get it right.

Keep in mind composition: I like to make sure I have some earthly aspect in my photos of the night sky: a mountain or a tree line gives perspective. Once you have it down pat, start throwing in new challenges, like posing people, etc.

Good luck and be sure to tag all your Kananaskis adventure photos with #KOmtnLife for a chance to be featured on our social media! 

the-phoenix


Latest Stories

Summer Tours

Winter Tours

Like this article? Share!


Continue reading

The day Barrier Lakes was drained

The Day Barrier Lake was Drained

Some of you may have noticed that Barrier Lake is looking lower than usual this summer. This question comes up a lot around the shop and at the beach:

“Where did all the water go?”

Our stock answer is that the water level was lowered for flood mitigation purposes.

The long answer is that TransAlta was paid $5.5 million to divert water through the spillway rather than store it in the reservoir for hydroelectric power generation.

They are letting it fill as fast as they can at the moment and the water level is rising. At the time of writing (August 15th, 2016), the water still isn’t touching the Targett point boat launch (far from it in fact).

Some of you may have noticed that Barrier Lake is looking lower than usual this summer.

The silver lining is that Barrier Lake’s beach has never been bigger. Less water means more ‘sandy beach’ at Barrier Lake Day Use Area. We noticed this and can’t put to words how nice it is to see a full parking lot and a spacious beach on a hot, sunny day.

But, back to the day, the lake got drained.

The sky was threatening rain all morning, but our group was keen to be outside despite this. We paddled the entire length of the lake, and for a little variety we headed up from Jewell Bay to the mouth of the Kananaskis River’s delta at the mouth of Barrier Lake. Something small and white popping out of the sand caught our eyes.

golfball2
golfball3

After a few perplexing minutes, we ruled out the guy firing golf balls from near the highway and started to look at alternate hypotheses.

We had two main theories that explained the golf balls’ sudden appearance.

  1. The Washed Down Theory: The balls washed down the river from the golf course after getting smacked into the river during the spring high water events as a process of natural erosion.
  2. The Act of God Theory: The balls got scoured out of every nook and cranny that they were stuck in for the last two+ decades that the golf course has been operating after the biblical Kananaskis flood of 2013.

No matter the reason for the appearance of these perplexing dimpled orbs, the golf balls were deposited in the alluvial region of the river. After a few weeks of continuous rain in the valley, the balls started to pop through the sand.

We decided that a bunch of the balls were around four to five years old, and some were upwards of 15 years old, as they have been out of production for quite some time.

I personally counted and collected around 100 in total. I left many, many, more to inspire adventure in others. We dug up a bunch and put many of them into patterns; what else do you do with a bunch of golf balls that you found on a sand bar on a lake?

golfball4golfball5

As an experiment, we wrote HI in golf balls, mostly just to see if we could see it from the highway. Indeed, we could see the letters, but regrettably, my picture didn’t do it justice.

The paddle was a surprising one for all of us. The lesson I took home was that you just never know what to expect. I have canoed on that lake over a hundred times and I have never seen anything like it.


Latest Stories

Summer Tours

Winter Tours

Like this article? Share!


Continue reading

Hikes we Like: Prairie View

Hikes we Like: Prairie View

This hike is a fairly easy 15-km loop that starts from the Barrier Dam parking lot. It is suitable for those looking for a half-day hike who are willing to drive about 15 minutes from Kananaskis Village. (On a bike, I would classify this as a third of a day). The trail is gentle with gradual elevation gain—300 m over 8 km.

To access the trailhead from Kananaskis Village, head back out to Highway 40 and go left (south) towards the Trans-Canada Highway. After about 15 minutes you’ll reach a sign that says Barrier Lake. Keep driving and turn at Barrier Dam, another few minutes down the road.

There are 11 switchbacks (count ’em) through the trees to the ridge.

The trail starts around the dam on the flat gravel path that circumnavigates the lake. At the other side of the lake, there’s a path that leads into the wilderness (AKA trees). Take it all the way (seriously, this feels like it goes on forever) under the power lines, through the meadow past the first intersection, and sign to the second one where the path crosses Stoney Trail (you’ll see a green signpost). Turn right, then take a pretty quick left that leads up the mountain.

There are 11 switchbacks (count ’em) through the trees to the ridge. Many paths shortcut the trail, but they’re steep and not well packed, so can be extremely slippery; I do not recommend these. There is also a path that leads off into nothingness on the right side of the trail; don’t take it.

The trail continues and becomes a bit steeper, but that doesn’t last very long. You’ll hit a small, open resting spot where you can see mountains ahead and the lake beside you. The high point of the trail is a rocky outcrop with an awesome view back toward Barrier Lake and Mount Baldy. You can identify this point by the massive white metal square in the trees behind (I have no idea what it is).

This is the turnaround point for most people, as well as where Jewell Pass connects to the Prairie View trail. However, if you want to keep hiking to the lookout, it’s only another kilometer or so and 125 m elevation gain. Continue on the path to the right of the rock outcrop (if you came up Prairie View).

The trail begins indistinctly but becomes apparent further on. This section is considerably steeper than the first, as well as narrower and less clear, but is short and definitely doable. You may have to climb over rock slabs. As you get closer to the summit you’ll begin to see over the other side of the ridge. Mount Yamnuska, the highway, rolling prairies, and even the cement plant come into view and make a great photo opportunity.

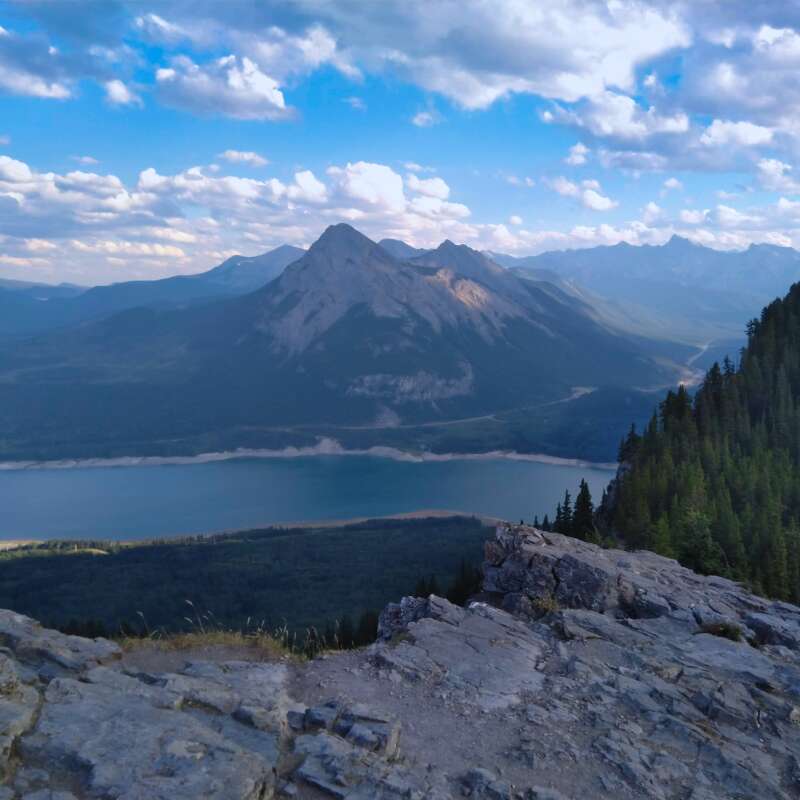
Enjoy a 360⁰ view of the mountains, lake and beautiful scenery in every direction.

You’ll pass some signs along the way that say “No firing guns” “Private residence ahead” and fun things like that. At the top is a small building where the fire lookout monitor lives, so please be respectful. There are multiple structures including a helipad that you can wander around.

Enjoy a 360⁰ view of the mountains, lake, and beautiful scenery in every direction. If you’re lucky you’ll meet the cute dog who lives with the current fire lookout monitor.

Heading back down the same way you came up, you can choose to take the same trail back or venture down Jewell Pass. I didn’t take Jewell Pass because a couple I ran into told me they had spotted a bear (bring your bear spray!) and being a lone hiker, I decided not to risk it.

If you’ve made it down to Barrier Lake early enough (before 5 and on the weekend), you can drive back to the Barrier Lake turnoff and enjoy one of our boat rentals—canoe, kayak or SUP. If it’s too late or you’re just exhausted, go back to the lake and relax on the beach as you admire the scenery.

Happy hiking!


Latest Stories

Summer Tours

Winter Tours

Like this article? Share!


Continue reading